
Miss L and I did some crafting together today. When I explained what I had in mind she responded, ‘No! I want to do drawing with my sparkly pens!’, in typical preschooler defiance. She did do drawing, and it was beautiful. But she was intrigued by what I was creating and quickly changed projects.
So we made some cute little photo/picture frame magnets for the fridge, using the top rims of tin cans and old/unwanted advertising magnets. Together. We had fun! Here’s what we did.
Find a tin can with a ring-pull lid. Open it (using the ring-pull), remove lid and use whatever’s inside! Wash and dry can. Then use a can opener to go around the top of the already opened can to remove the rim. One of the more modern types of can openers (like that pictured) will do the job.

You will be left with a useful tin (minus the sharp bit on the inside) to house all sorts of goodies… as well as an interesting tin ring. (It was the need to get rid of the sharp edge that’s left at the top of a ring-pull can after opening, that led me to discover this upcycling-worthy item.)

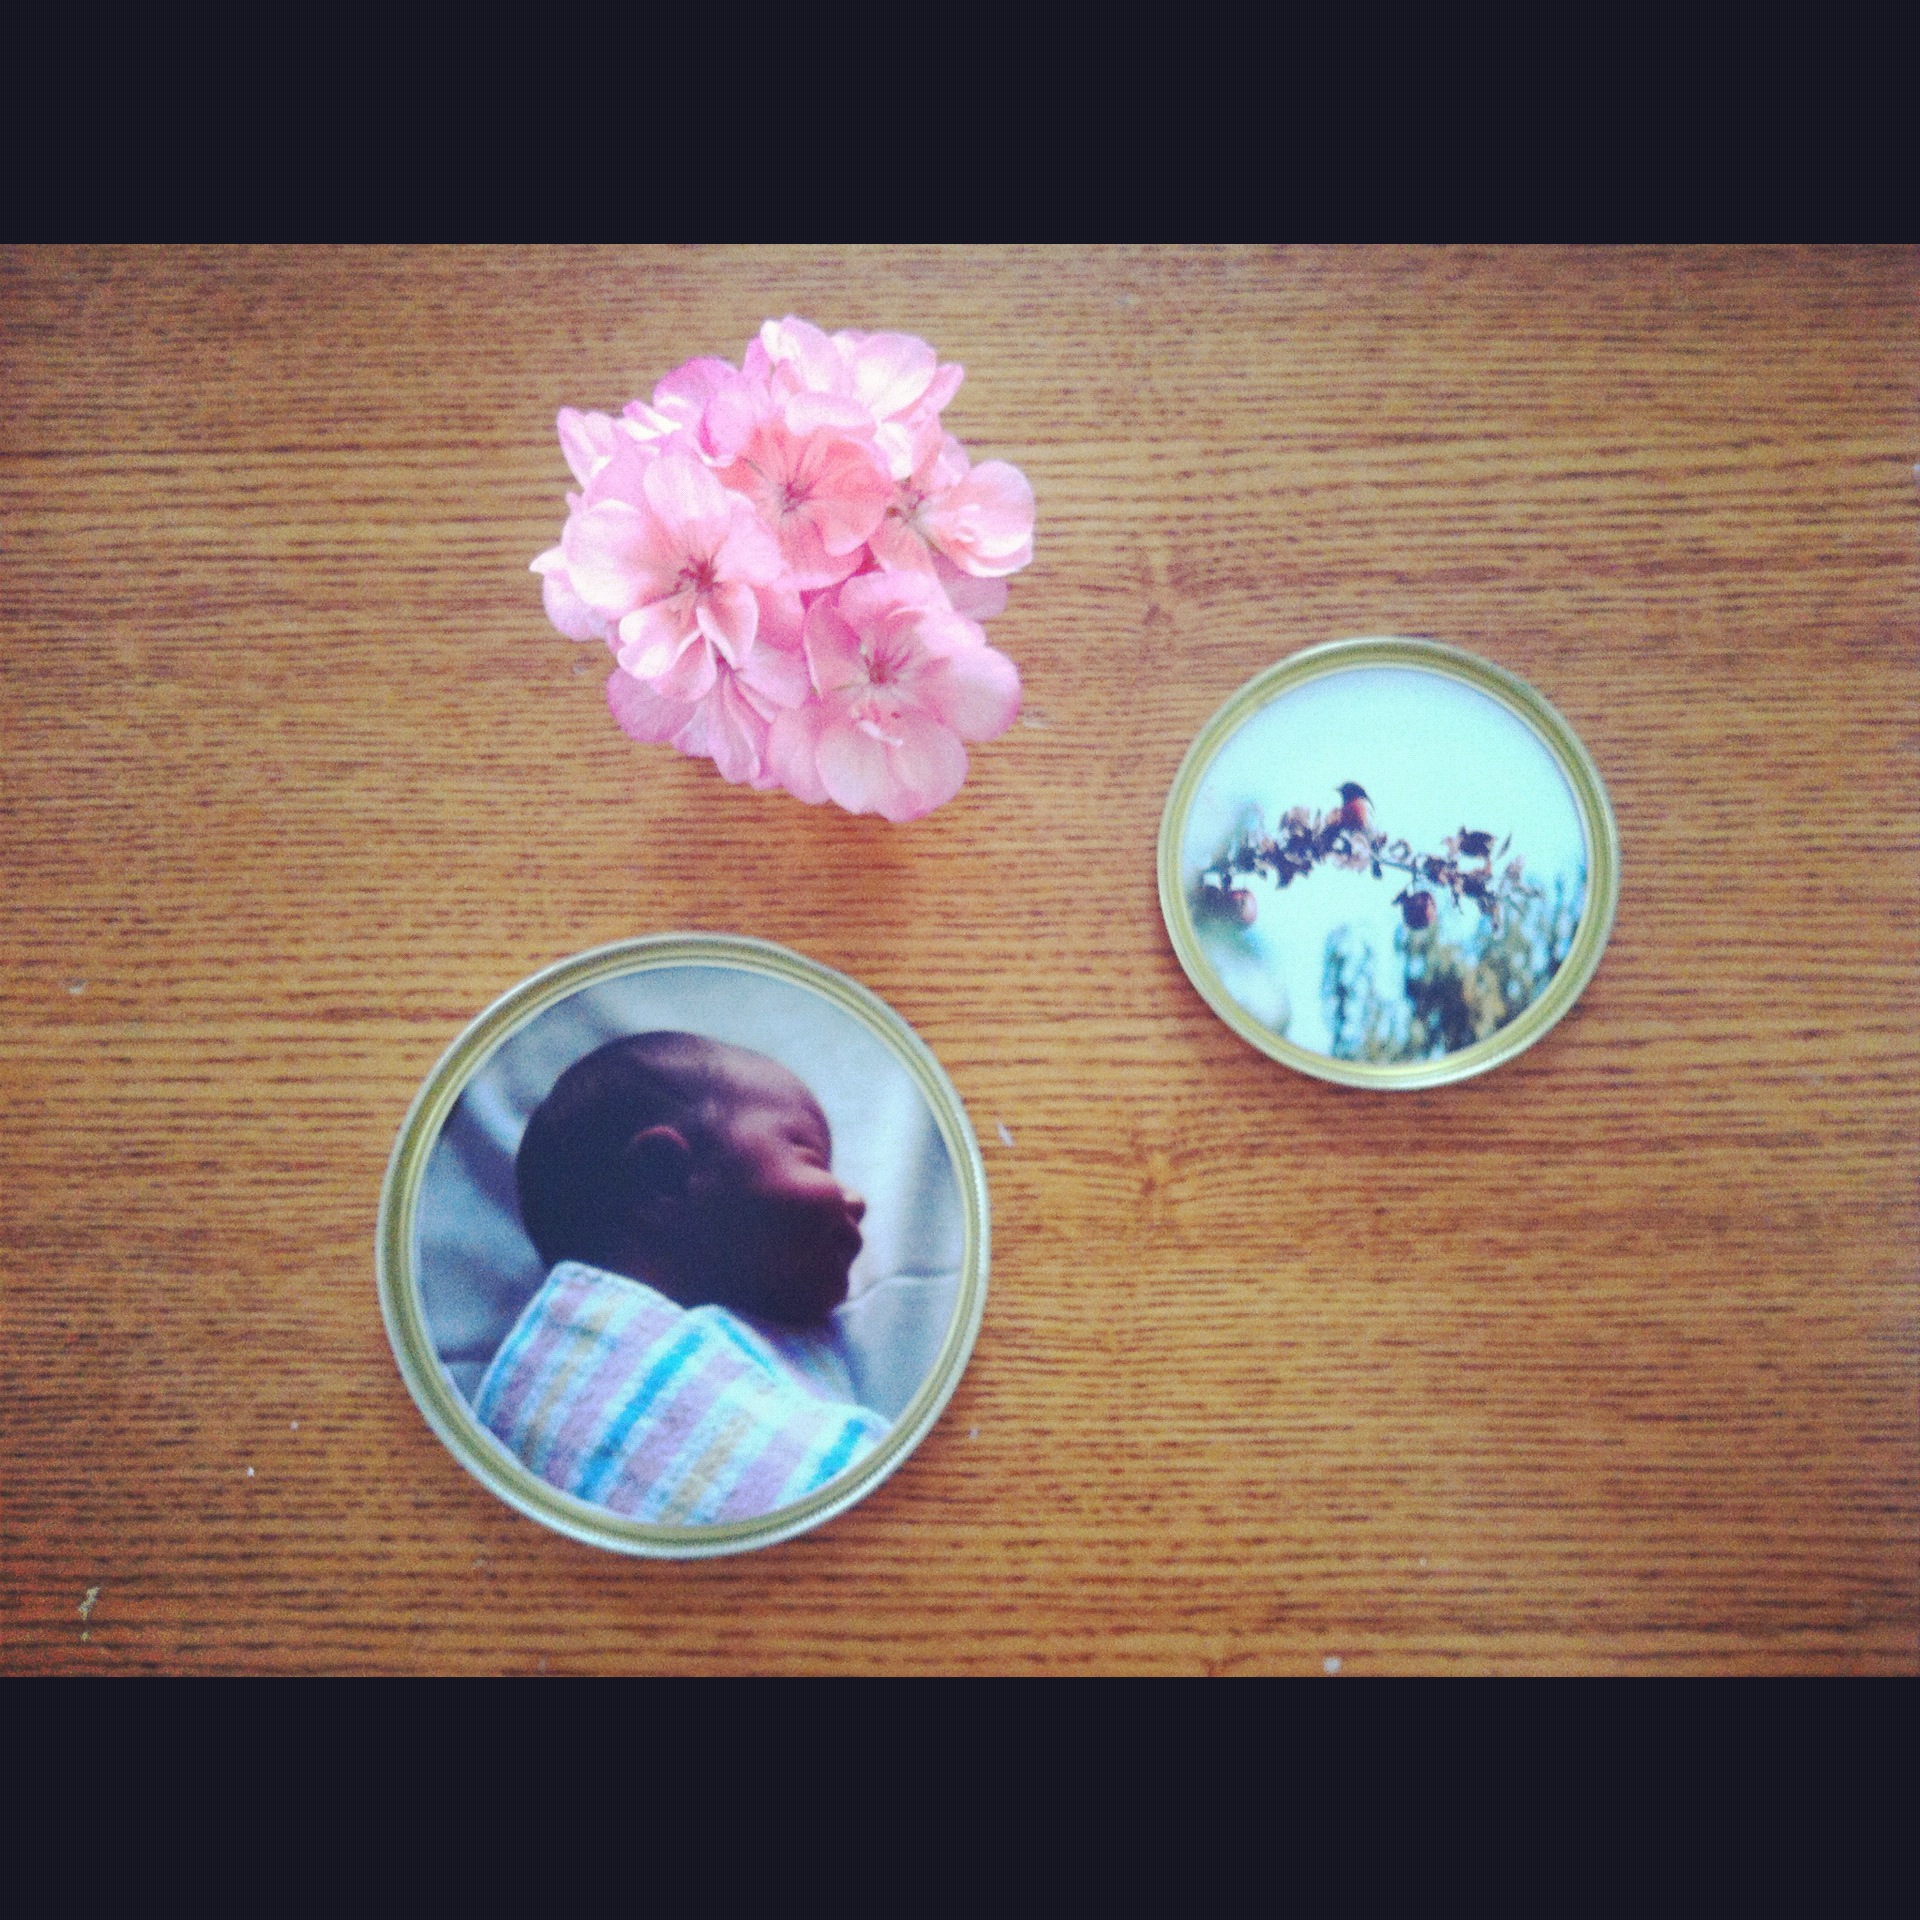
Can you see that this otherwise piece of rubbish (well, actually, recycling!) is a perfect little frame? (Click on the photo above to see the pattern of close lines on the rim). So, find a sweet picture, a photo of a loved one or your child’s artwork. Use the tin frame like a viewfinder to choose the best part of the picture then trace around the outside of the frame there. Cut out your circle neatly.

Then glue the frame onto the picture using PVC glue (I just happened to have it) or something else that will glue metal to paper. It’s easiest to apply the glue to the frame rather than the picture. And remember: with glue, less is more! Alternatively, cut your picture to fit inside the frame, glue the wrong-side edge to the front of the inside rim, then glue a piece of card (re-use an old card, cereal box, etc) on to back of the picture and frame. This produces a sturdier result, but I prefer the neater look with the picture behind the frame (you don’t need to cut quite as neatly, either)!

You might want to leave the glue to dry a bit before the next step, which is glueing on the magnet. Find a heavyish object to place on top – I used another tin can (with contents). For the magnet I cut a square piece from an old advertising magnet (I could have done a circle but I find it easier to cut square shapes). I have a stash of these just through keeping old ones that I’ve acquired over the years. I’m not a fan of advertising magnets – they’re not necessary, not recyclable (though at least re-usable) and create extra landfill. But being on the receiving end of them has been unavoidable at times. Anyway, these magnets make a nice flat backing surface for the picture, and you don’t have to go out and buy more stuff.

Apply a thin layer of glue to the magnet (printed side), then place onto the back of the picture.

Leave to dry, picture side up, with a heavy object on top.

Your lovely framed picture magnet is complete. They look much nicer on the fridge than business names and phone numbers (and real estate calendars)! You could also make little doll house picture frames using the same method, minus the magnet. Or cut out pic’s and sit them inside jar lids and glue a magnet on the back…but I like the look of the pattern on the tin rim.


Brilliant upcycling. Thanks for sharing!
Thank you, Biocadence! I love to share 🙂
Well done. Interesting project. Can imagine fridge covered in pics now instead of bills and uninteresting things. Except ofcourse family drawings.
Thanks, Annie 🙂 Pre-kids I used to prefer a fairly bare fridge door…but I’m very happy with seeing lots of colourful artworks and photos on it nowadays!!