Tag Archives: craft

Softies for Mirabel

Hello friends!  I’ve been away from this particular screen for a long while.  Moving house (back to my old place…hooray!), and still unpacking and organising (mostly solo with the addition of two pairs of small helping hands) being the major excuses.

IMG_6222

Anyway, this is intended to be a brief post as I’m exhausted after celebrating Miss L’s fifth birthday with a wonderful farmyard-themed birthday party (more to come on this soon I hope). I have just packaged up this year’s contribution to Softies for Mirabel, ready for her journey to Melbourne tomorrow.  She is a softie doll named ‘Sophie’ who I created several months ago using vintage, reclaimed and remnant fabrics, 100% wool felt and recycled polyester stuffing.  Sophie has her own sleeping bag and pillow, which might come in handy for the trip I guess.  

image

Somewhere there is a child who is going to meet Sophie and hopefully become her pal, some time after Christmas.  Thanks to the work of the Mirabel Foundation, an organisation based in Melbourne, that assists children who are affected by parental substance abuse.  The toy drive was the brainchild of the totally awesome, Pip Lincolne of Meet Me at Mikes.  Crafters from across the globe send in their handmade (sewn, knitted or crocheted) toys which are then matched to a Mirabel child for Christmas.  Last year I sent a toy in for the first time – a cat named Ginger.  He was based on a design that my daughter drew when she was three.

IMG_1922

I had planned to write this post to promote the 2013 Softies for Mirabel toy drive.  But I’m a tad late.  I only discovered tonight that the deadline for posted toys to be in is November 30 (Sophie should just make it)!  Anyway, that should give any crafty types who are reading this plenty of time to whip up a handmade toy for next year.

Advertisement

2 Comments

Filed under Green Craft, Kids Stuff

Handmade Gifts of Crochet Love

Over the past few months I seem to have given myself the challenge of creating any gifts that are given by me or my family.  There has been a run of birthdays including those of Miss L’s preschool classmates, family and friends.  Plus a new baby here and there.  So I’ve been busy.  Here’s the list thus far:

softie teddy

lavender eye pillow

lavender hand balm

two super hero costumes (plus an extra set for Miss L …the prototype actually)

two softie bunny-type creatures

half a dozen crochet hens’ eggs, and

two sets of crochet headband, wristband and brooch.

This is the one I just finished for my daughter’s little friend who’s turning five tomorrow.

IMG_4963

I’ve certainly been doing my share of crochet lately.  As I have said before I find it therapeutic…relaxing…satisfying.  I had already made a few of the little flower headbands for Miss L, but with 8 ply acrylic yarn.  I love the natural, crisp look and feel of cotton though.

The handy thing about small creations like these is that yarn leftovers can be utilised.  In this case it was someone else’s leftovers purchased by me on ebay.

P1010230

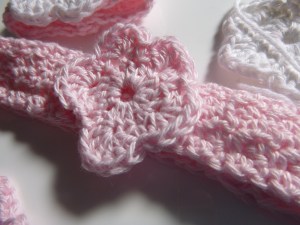
To make the bands for the headband and wristband I used a very simple crochet pattern called ‘up and down stitch’, which features treble crochet (US double) and double crochet (US single) in alternating stitches.  My recent discovery of this, and plenty more patterns in my vintage copy of Reader’s Digest Complete Guide to Needlecraft was a delightful moment.  I felt rather ashamed that I hadn’t looked at it sooner, especially because my mum had lovingly given it to me a couple of years ago.  To think that I’d been scanning the pages of Pinterest rather than handling the leaves of a humble book that was at my fingertips all along!  My grandmother would shake her head.  Anyway, here is the pattern:

Chain a multiple of 2 ch plus 2 (I couldn’t work out why this isn’t just a multiple of two…perhaps it’s acknowledging that the length is the multiple of 2 ch, not the plus 2 bit as well?)

Row 1

skip 2 ch, 1 dc (US sc) in next chain, *1tr (US dc), 1 dc *, 1tr, ch 2, turn

Row 2

skip 1st tr stitch, *1 tr in dc of previous row, 1 dc in tr of previous row*, 1 tr in ch 2 of previous row, ch 2, turn

Rep from Row 2

P1010229

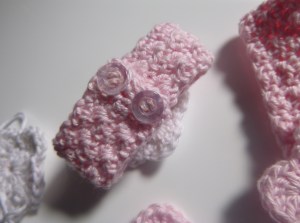
I used a 4 ply cotton and 3.5mm hook for both the headband (100 chains long) and wristband (34 chains long).  Obviously your chain length will vary depending on the size of the recipient (in this case, a five-year-old girl).  Both the wristband and the headband are about 8 rows wide (I forgot to write this down so I’m not certain…but just make it to your desired width)! To join the ends of the headband strip I overlapped them slightly and hand sewed together using the same cotton.  I found that the up and down stitch of this width produced a pattern with two tiny holes at the ends of the band – perfect button holes, which I utilised for fastening the wristband!  (Alternatively you could create button holes by skipping a few stitches where you want your button hole and just chaining for this tiny section instead; or making a little chain loop at the end of the band.) Then two little buttons were stitched to the other end.

P1010228

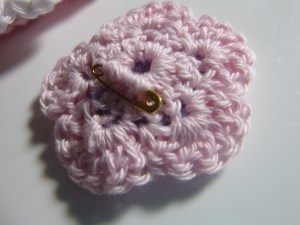
The sweet but simple flower pattern was courtesy of the very generous Scrapbooking and Cards Today Mag blog.  (Note that this pattern is written in US terminology.  ‘Double crochet’ (dc) equals ‘treble crochet’ (tr) in Australia and the UK, and ‘single crochet’ (sc) equals ‘double crochet’ (dc) in UK and Australian terms.)  By varying the size of the hook and yarn, you can make different sized flowers.  The largest hook I used was 4.0mm the smallest was 3.0mm and the yarns were 3-4ply cotton.  For the other headband set I also used a 2 ply cotton with 1.75 and 2.0 mm hook and these flowers turned out very sweet (great for the smaller flowers on the brooch). The little purple flower was created by mistake.  Instead of six trebles (US dc) for each petal I did six double crochet (US sc).  But it turned out just right for the upper flower part of the brooch.

P1010226

You can combine the flowers in whatever way you choose.  For example, you might like two of different size and colour for the headband or three for the brooch.  And you could put button centres on the headband and wristband too.  All flowers were hand-sewn on to the bands or to each other using the same cottons (I actually used the tails in most cases).  The little button was secured to the crochet flower beneath it using cotton thread.  To finish off the brooch I sewed a small gold safety pin to the back with cotton yarn.

P1010227

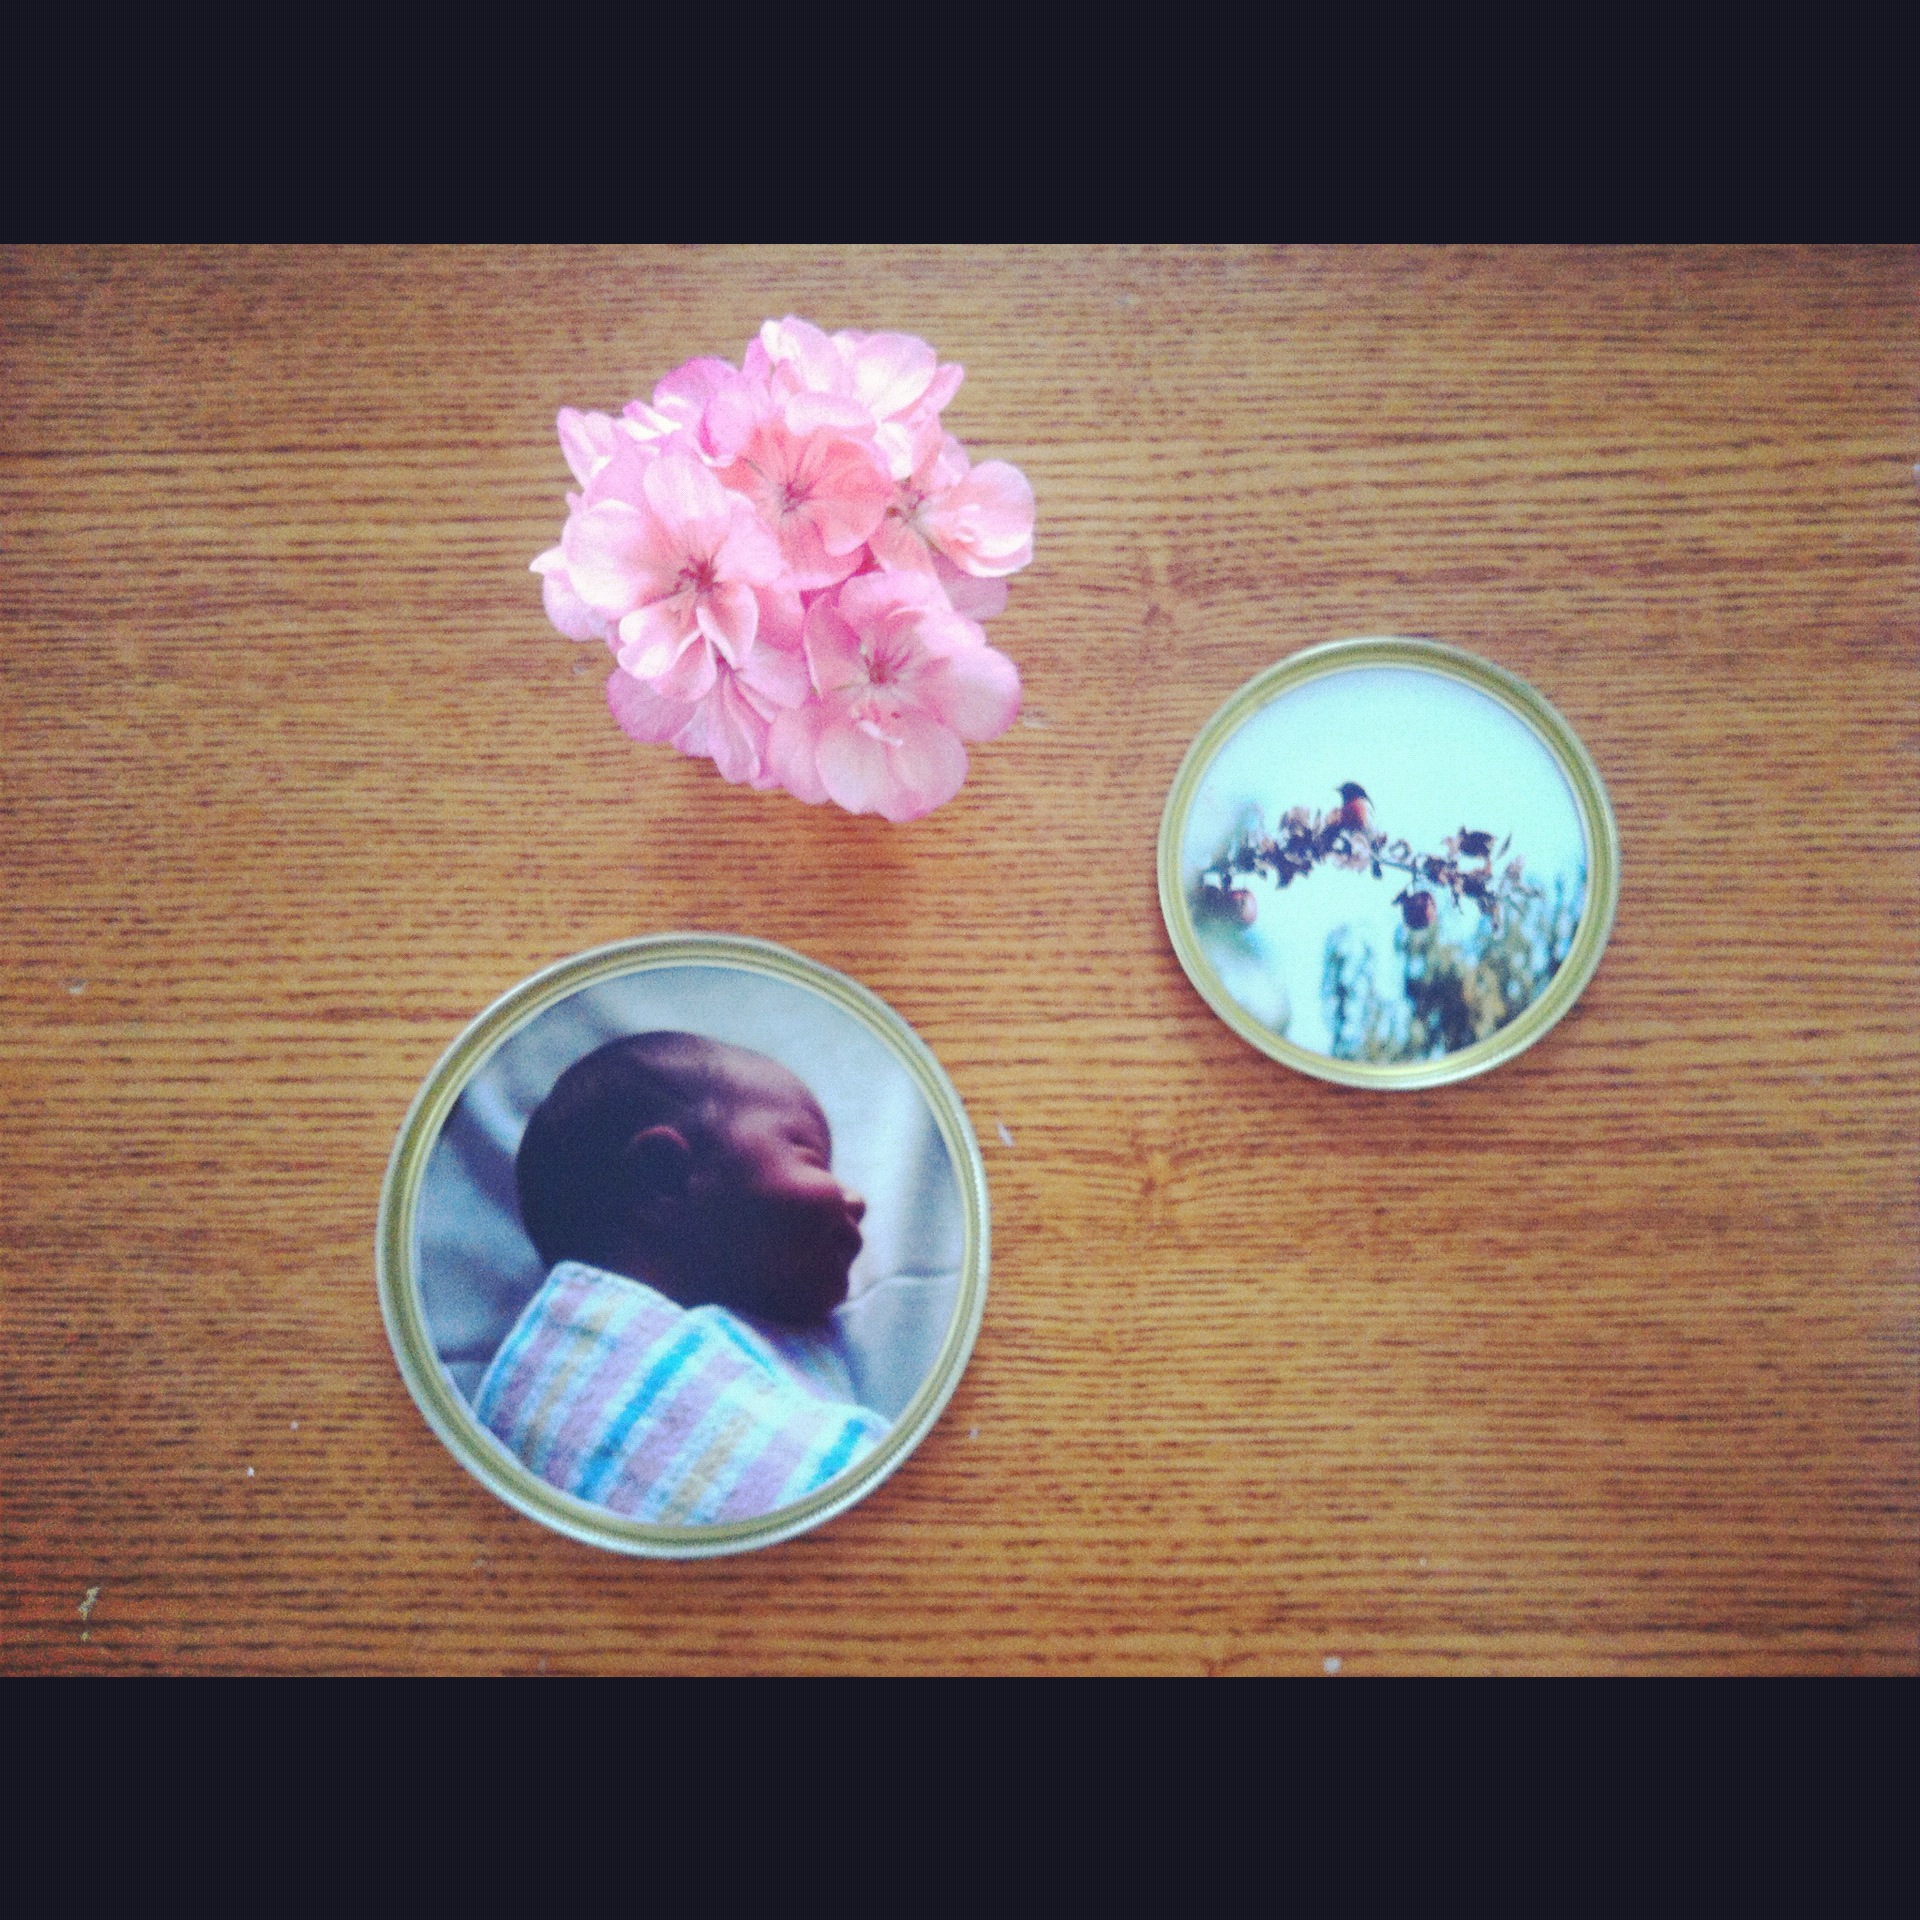
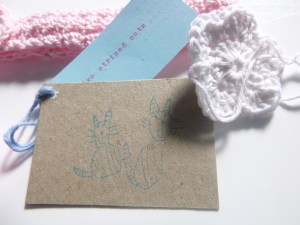
And as a final touch I added a little card  with Miss L’s two striped cats drawing.  (I couldn’t resist having it converted into a stamp…to Miss L’s amazement.)

P1010224

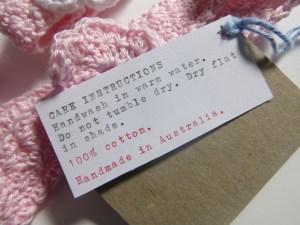
Together with some good old-fashioned type-print from my old-fashioned friend.

P1010236

We shall find out tomorrow if Miss Turning-Five likes her gift!

6 Comments

Filed under Green Craft

Weekly Upcycling Inspiration: The Cardboard Box

Welcome to your weekly serving of upcycling inspiration! Once a week I’m going to feature an item for which I’ll endeavour to list some upcycling ideas. They might be my own or they might just be little light bulbs of genius that I pinch from someone else.

Cardboard boxes are incredibly useful for their intended purpose of storage and transport of goods. And they can be reused in this way over and over again. Plus they are completely recyclable and biodegradable (minus any sticky tape). We love cardboard boxes in our household as they are a wonderful resource for kids play. There is always a supply on hand ready for a rainy day!

1. If you haven’t visited my Makedo Creations page yet, then go on, take a peak. I hope you’ll be inspired by what my husband and daughter have made with boxes and other recyclables and trash. Here is their latest creation…a checkout.

20130527-025039.jpg

20130527-030027.jpg

20130527-030305.jpg

20130527-030337.jpg

Complete with conveyor belt, scanner, monitor, scales, eftpos machine and packing area it’s been a popular play area for the children for the past couple of weeks. It uses only boxes and Makedo connectors plus an old mobile phone (eftpos machine) and real scales.

2. Use to suppress or kill weeds and grasses under a thick layer of mulch. Overlap pieces of opened out cardboard box on the area to be mulched, wet down then apply mulch. This is also a great way to smother grasses when building a no-dig garden bed or other raised garden beds onto a patch of lawn.

3. When wrapping odd-shaped gifts place the items in a box then wrap (reuse wrapping paper and other papers, fabric, etc). It will be much easier and neater.

4. Make an office in-box by cutting off one large side and the top. Cut the end of the narrow sides on an angle. Cover in decorative or interesting paper or fabric.

5. Make a magazine holder with a sturdy cereal box.

6. Place strategically under furniture when rearranging it, to protect the floor and make it easier to slide.

7. Entertain your pooch. Fill smaller boxes such as cereal boxes with dry dog food or treats, close then give to your dog to rip apart. This is a fabulous way to feed an active or young dog who needs lots of stimulation. Rather than gobbling up the food in a flash, your dog will spend extra time extracting the food and tearing up the box. The pieces of torn cardboard can later be placed on the compost.

8. Make a sled for snow or a grassy slope.

9. Protect fingers when hammering a nail. Push the nail through one end of a rectangular-ish piece of cardboard and hold onto the other end once you commence hammering. Remove cardboard then complete the hammering if necessary.

10. When transporting furniture and household items in a vehicle or trailer, use pieces of cardboard box placed flat against the items to protect against damage from rubbing and to help hold them in place. Use small pieces under ropes, again to stop rubbing but also to help secure the items when the rope is tightened.

Of course if you are a cat (or live with one) then you know what the best use for a cardboard box is, don’t you? No need to waste precious energy on upcycling. 🙂

2 Comments

Filed under Green Craft, Kids Stuff, Living Green

Becoming a Green Crochet Queen

Are you a crochet queen or a knittaholic? I’ll admit to being neither although I’m aspiring to be the former lately. I was taught the basics of crochet and knitting as a youngster. My mum is a champion of both crafts but she’s particularly talented with a crochet hook. So was her mum and grandma and aunty. Here is a photo of Miss L in the christening gown my mum crocheted for me when I was a baby.

Miss L donning Mum's crochet christening gown

I witnessed a lot of crocheting when I was growing up. After making a scarf for my teddy (did you start with a scarf too?) I resigned. But soon after my crochet queen greaty aunty passed away last year, I found myself taking up the hook once more. I purchased a bulk lot of preloved crochet hooks and some yarn leftovers on ebay and got started with some granny square fun (and frustration) via the amazing and inspirational Pip Lincolne and her book ‘Meet Me at Mikes‘ together with Pip’s excellent granny square video tutorials. The online crafting world is incredibly generous with sharing knowledge and ideas. So even though I don’t have the luxury of having my mum or my grandma or great aunty sitting next to me guiding me through the process I’ve been able to tackle this new skill with some confidence.

Crochet hooks in fabric roll holder

I love all kinds of crafting, but what I particularly love about crochet is the peace and quiet (not even a click-clack). Being able to create something lovely and useful without making a sound is quite rare. It’s a wonderful way to relax and unwind after a challenging day. And if you like a bit of telly or film, you can watch that at the same time. (I’d avoid any distraction whatsoever whilst learning though!) Another awesome thing about crochet is that it’s so portable. Just one small hook and a ball of yarn and you’re good to go. I keep my latest project in a little cotton bag ready to take with me. And there is no shame in crocheting in public. I’m quite happy to be judged by onlookers as being a bit old-fashioned. I reckon people waiting in doctor’s surgeries would be a whole lot happier too, if they could while away the time with crochet.

Crochet cushion cover in the making

Crochet also happens to be a very green craft. It requires minimal equipment which is easily obtained second hand and is made to last. It doesn’t require any electricity. And it lends itself to re-using all sorts of materials, as well as sustainable natural fibres.

Crochet iPad cover using yarn remnants

Crocheting with plastic bags is nothing new to me. Anyone who grew up in Australia in the 70’s or 80’s must have seen some kind of bread bag crochet creation before. But do an online search for ‘plarn’ (plastic yarn) and you’ll be astounded at what some clever crafters have come up with. Here’s a cool clip showing how to make yarn from plastic bags. Then there’s t-yarn (made by cutting up an old t-shirt), VCR tape yarn, old sheets (and other fabrics) yarn and reclaimed yarn (from unravelling old knitwear). As well as making your own yarn, there are commercially available recycled yarns, including 100% cotton made from recycled denim, and acrylic yarn containing a percentage of recycled plastic. Amazing. There are also many smaller online businesses (including on ebay and Etsy) that sell reclaimed yarn produced by unravelling garments, T-yarn, and silk from saris. Incase you don’t have the time or patience to do it yourself.

The Red Thread: How to Make Fabric Baskets The Etsy Blog: How to Make Plarn and Crochet an Eco-friendly Tote Bag

Enter the world of eco-friendly yarns and you’ll also find organically produced natural fibres, including cotton and wool as well as the lesser known flax, hemp and nettle. All of which are made with minimal environmental impact. Do a bit of googling and you’ll be pointed in the appropriate direction. Remember your local charity store and ebay for all kinds of yarn leftover goodies, too.

I’m pretty pleased that I’ve taken up this craft again. Whenever I reach for my hook and yarn…or plarn…or t-yarn…I imagine my great aunty J is watching down on me with a huge grin. Yes, no doubt she’s proud that her beloved craft is being carried on to another generation. And she must be delighted that the art of thrift is making a resurgence. But largely her joy would have to come from the comedy that is seeing me fumbling away at the pace of a snail but the determination of a bulldog. I’m still learning. But I’m getting there.

4 Comments

Filed under Green Craft

Weekly Upcycling Inspiration: Denim Jeans

Welcome to your weekly serving of upcycling inspiration!  Once a week I’m going to feature an item for which I’ll endeavour to list some upcycling ideas.  They might be my own or they might just be little light bulbs of genius that I pinch from someone else.

OK.  So everyone must have a pair of old, no-longer-fit-to-wear, denim jeans in their wardrobe.  Right?  Well, get them out of the closet and do something with them!  Here’s a list of some clever projects to direct you to that something. (And not one of them involves cutting the legs off and turning them into shorts.  I promise.)

English: Young woman modelling a pair of denim...

1. To start you off, here is a useful guide on deconstructing a pair of denims for sewing projects.

2. Make a pocket board.  Remove pockets (from multiple pairs of jeans), attach them to a fabric covered board, and they become a handy storage place for small items.  Here’s one that Sew Daily already prepared for us.

3. Create a bag.  There are soooo many ideas for these online.  Take a look at a few: here, here and here.

4. Pop over to Makezine and learn how to sew a storage basket with jeans legs.  I’ve made one.  Why don’t you try too?

Upcycled jeans storage basket

5. Whip up some super cool bunting.  Simply cut out your triangles with pinking shears and join with bias binding or cotton tape.

6. If they still fit around the butt, but need a bit of extra length because someone’s little legs are growing up, up, up…add some gorgeous fabric at the leg-ends.  Take a look at these.  Cute.

7. Cut off the seams and make a bangle bracelet with Mich L. in L.A.  So simple!

8. Make a skirt.  Here’s one for a youngster, from Comfy Pretty.  And here’s another that could be used for a big girl too.

9. Make a hat.  Thoughts From a Seamstress doesn’t provide instructions…but she does give a pattern number and step-by-step photos.

10. Make a pair of slippers, via this how-to at The Guardian.

11. Make an apron.  A Girl and a Glue Gun shows you how.

12. Make some drinks coasters.  Just cut out two 10cm squares of denim, sew around the edge with right sides together, leaving a 5cmish gap for turning.  Turn inside out (so right sides are facing out), stitch the opening to close it and top-stitch around the border if you like.  Or…just zig zag the two squares together (wrong sides facing) for a rough look.

13. Make a tablet cover.

14. Make a knitting needle case.

15. And finally, more denim ideas …from Martha.

It seems a pair of old jeans can be re-hashed into just about anything.  So go on.  Get yours out…and get making.

Leave a comment

Filed under Green Craft

Weekly Upcycling Inspiration: The Egg Carton

Welcome to your weekly serving of upcycling inspiration!  Once a week I’m going to feature an item for which I’ll endeavour to list some upcycling ideas.  They might be my own or they might just be little light bulbs of genius that I pinch from someone else.

Two Striped Cats: Egg Carton

This week it’s the egg carton in the limelight.  What a cleverly designed bit of cardboard!  Almost as impressive as the little parcels of goodness that they are meant to protect.  I have trouble letting go of egg cartons because they are just so useful.

If you’re lucky enough to keep your own hens then the best and most obvious use is sorted.  In fact at peak laying time you’ll probably be begging your friends and family for egg carton donations!  Apart from re-using them over and over again for their intended purpose, here’s what else you can do.

1. Organise and store all kinds of goodies:

sewing supplies such as bobbins, safety pins, buttons, thread, small lengths of ribbon;

– small craft supplies;

stationery supplies;

– christmas ornaments, especially fragile glass baubles;

– decorated Easter eggs (real ones that have been blown);

Two Striped Cats: Decorated Carton Housing Dyed Eggs

– jewellery –  ideal for kids.  Here is a cute jewellery box project for kids, from B-Inspired Mama;

– hair accessories – clips, hair bands and bobby pins;

– a child’s rock collection;

– hardware – nuts, bolts, washers, screws, tacks;

– small plastic toy animals or dolls.  This cute one over at LilyBean’s Paperie has been decorated to hold plastic farm animals for a gift.

Not only will the compartments keep small items safe and locatable, the cartons stack for easy storage into boxes, drawers or on shelves.  You might like to decorate them first with paint or paper.

2. Plant seeds – fill each compartment with seed raising mix, sow the seeds, and water-in.  Once the seedlings are large enough, cut the carton up into individual cells then transfer them to the garden, still in their section of carton.  The roots will be protected from damage during the transplantation process and the carton will break down in the soil.

3. Make some play eggs (crochet, fabric, modelling clay, etc) and store them in an old egg carton.  Or just keep an empty egg carton in the play kitchen.

Two Striped Cats: Crochet Eggs

4. Use to package mini muffins and other small treats that you’ve made for gifts.  Decorate first by painting or covering in pretty or interesting papers.

5. Make a pair of goggles for kids play.

6. Use for kids craft.  

7. Create these sweet buttons by Pretty Little Things.

8. Turn into a kids’ paint palette by placing a dollop of paint in each compartment (you might like to leave some empty for mixing colours).  The paint will eventually dry up (but not before that masterpiece is produced) and the palette can be used again.  Or allow your child to colour the carton with any left-over paint, once the other artwork is complete, and turn it into a storage container.

9. Make a colour sorting game for toddlers or preschoolers.  Or an egg carton counting game.

10. Use as a favour bag at a childrens’ birthday party.

Check out these pics on Flickr for some more ideas!

Happy upcycling!

Leave a comment

Filed under Green Craft, Kids Stuff

Weekly Upcycling Inspiration: The Tin Can

Welcome to your weekly serving of upcycling inspiration!  Once a week I’m going to feature an item for which I’ll endeavour to list some upcycling ideas.  They might be my own or they might just be little light bulbs of genius that I pinch from someone else.

Craft tool cannister

This week I’m featuring the tin can (also referred to as the steel can or just plain old can or tin).  Steel is 100% recyclable, and although considerably less energy is required to produce steel from recycled cans (75% less than making it from scratch, in fact)  it takes only a little bit of your energy to transform a can into another very useful thing.   (Check out some tips on recycling cans here.)

Pencil holders: cans covered with origami paper

1. Decorate (or not) with pretty or interesting papers (old maps, music sheets, wrapping paper, etc), paint, fabric or old buttons, and use as canisters to house all kinds of items – pencils and pens, paintbrushes, scissors, tape, rulers, knitting needles, crochet hooks.  Take a peek at these clever storage ideas here and here.

2. Turn into pots for plants.  Make drainage holes in the base first, using a drill with a drill bit designed for metal. Decorate or leave plain.  I tend to go for the natural look as the rust that develops adds charm.  Or you might like to leave the label on.  Any steel can is fair game – large or small, round or square.  The small tuna-type cans make cute little pots for succulents, which survive with minimal soil as their roots are so shallow.  Large cans, such as those for olive oil or Milo, make excellent pots for herbs.

Succulent in tuna can (this one was already coloured by the manufacturer)

Scented geranium in old Milo can

3. Use the top rim to make little picture frame magnets.

4. Make percussion instruments for youngsters.  For drums use larger cans with lids (and let your child bang away with whatever is on hand…hopefully something like a wooden spoon or chopstick).  Or cover a lid-less can with a section of old balloon or baking paper and secure with a rubber band.  If filled with dried pulses, rice, bottle caps – those sorts of things that will make noise when tossed inside a steel can – it can double as a shaker.  Go over to Mini Eco for a colourful version using ordinary tin cans.  Or be inspired by this too cool for school drum kit featured on Little Lovely.

5. Create a tin can lantern or try your hand at candle making (preferably using old candle scraps or beeswax) and use the can for a container candle or home-made citronella candle.  When it comes to melting the wax, you can even use a tin can to melt the wax in (as the part of the double boiler) so you don’t ruin a precious bowl.

6. Make a tin can telephone with the kids.

7. Need a height advantage?  Fashion a pair of can stilts.

8. Use as a round cookie cutter by removing the lid and base or make into custom shaped cookie cutters via Mother Earth News.

9. Stock-up the kids’ play kitchen.  Be sure to select cans that have a smooth edge where the lid was removed (or expect your bandaid stash to dwindle).  Wash carefully, leaving labels on.  You might be able to replace the lid (if removed with a can-opener rather than a ring-pull) and secure with glue, for authenticity’s sake (trust me…your child will think you are VERY clever)!

10. Make pigeon holes by glueing several cans together and placing them on their sides.  

What can you do with an old can?

Leave a comment

Filed under Green Craft, Living Green

Weekly Upcycling Inspiration: The Bread Clip

Welcome to your weekly serving of upcycling inspiration!  Once a week I’m going to feature an item for which I’ll endeavour to list some upcycling ideas.  They might be my own or they might just be little light bulbs of genius that I pinch from someone else.

This week’s star is the humble bread clip (or bread tag if you’d prefer).  Gosh…to think how many of these the world produces and then waves goodbye to once the little plastic things have performed their intended function!  And they can be quite harmful to animals or children who ingest them.  It makes me shudder…so I won’t think about that.  Instead lets ponder what to do with them after they’ve held our plastic bread bags closed for a little while.  Be sure to store them in a handy jar so you can easily add to the collection or reach for one when you need it.

IMG_3773

 1.  Use to hold short pieces of yarn or string.  You know those pieces I mean…the ones that are too long to discard but too short to be wrapped into a ball.  Keep the yarn/string-wrapped bread tags in a glass jar for easy location of that bit of string or yarn you need.  (I actually came up with this idea a few days ago when I was sorting and tidying my yarn.  I thought I was quite clever and original.  Until I searched Pinterest and discovered someone else had already thought of it. Of course!)

IMG_3775

2.  My husband  suggested this would be a useful way to store short sections of pre-made fishing rigs (eg, with hook, sinker, swivel and leader line) – wrap the leader line around in  a similar way to the yarn above, and secure the hook in the ‘mouth’ of the bread tag.

3. Label electrical cords when you have multiple cords in the one power point or power board.  This is particularly handy for computers and their associated paraphernalia…but I’ve labelled our kettle and toaster cords this way so I don’t get confused.  Also use to hold single thinner cords together when wrapped in a bundle.

4.  This fashion designer made her wedding dress out of 10 000 bread clips.  Very clever.  I’m not suggesting you do this…but these are the possibilities people!!

5.  Store a collection of elastic bands or hair bands.

6.  Make interesting mosaic-style artworks and use for craft – eg, bread clip figures, jewellery, and mobiles.  Here is a sweet bread tag charm necklace for kids to make.  (But please keep bread clips away from little ones who might be inclined to swallow them.)

7.  Mark the end a roll of sticky tape…you know…the end that you can’t locate until you’ve turned the roll full-circle at least three times.

8.  Clip a pair of socks together in the wash…so the sock fairy can’t run off with one.

9.  Fasten opened plastic bags containing food.  Close and label paper gift bags (perhaps after decorating with paint or marker pens).

10. Mark stitches in your knitting or crochet.

11.  Label spare keys.

12.  Fix your thong (if you live outside Australia read: ‘flip flop’!) if its splitting where the strap part comes through the sole.  Simply clip around the base of the strap, on the sole side.

13.  Use as a plectrum.

Going a bit too far with the latter?  OK I’ll stop there…but I’m sure it would work quite well.  And I’m sure I’m not the only one who’s thought of it.

What else can you think of?

Leave a comment

Filed under Green Craft, Living Green

Crafting Green

I love doing all sorts of craft.  Here are some ideas on greening up your crafting:

Use vintage fabrics or offcuts – charity shops are an excellent source of remnant fabrics and you’ll often find gorgeous vintage pieces, at very low prices.  There are some fabulous vintage fabric sellers online too…check out one of my favourites here.  Keep the tiny scraps of fabric left-over from your projects – cut up as you go and store in a bag/container to be used as stuffing.

Fabrics: offcuts, vintage and up cycled

Upcycle!  Transform worn-out, stained or torn pieces into something new – just avoid the areas of the item that have these flaws.  Old tablecloths, pillow cases, tea towels, woollen blankets, scarves, jumpers (woollen and polarfleece), jeans, shirts, and baby blankets have all found new life in my hands.  Your own cupboards will no doubt be a source of such fabrics, but charity stores again are a useful place to look.

Build up a collection of sewing bits and pieces by sourcing second-hand and vintage supplies, again from charity stores and online (ebay and Etsy are excellent).  These may have been used previously – eg, tools, buttons, remnant embroidery threads – or be old but unused and possibly still in original packaging – zippers, thread, needles, press studs, bias binding, etc!  I get excited when I scour the sewing/crafting section of charity stores…the best part is that everything is a discovery…you just don’t know what you might find!

Sewing supplies

No need to buy brand spanking new knitting needles and crochet hooks, either!  I’ve found all of mine on ebay and the local Vinnie’s and Salvo’s stores.  Ditto for yarn.  I try to tailor my projects to using what I have – patchwork squares, granny squares, softies and small items all lend themselves to using up scraps of yarn.

Buttons, knitting needles, crochet hooks

When second-hand or vintage isn’t available, choose supplies that are made of eco-friendly materials – organic/biodynamic cotton and wool, bamboo, hemp, pure wool felt and recycled PET felt.  These are all available through online sellers.

Become an organised hoarder!  Before throwing away an item ask yourself whether it could be used for craft.  I store broken crockery in labelled containers waiting for the mosaic masterpiece I’m going to create one day!  Although corks are recyclable, they are a versatile addition to your craft supplies – check out this idea for a cute home-made stamp.  Bits and pieces such as beads, broken jewellery, buckles, lengths of ribbon, and magnets all lend themselves to craft.

Magnets

If you are into paper crafts, collect pretty or interesting papers, card and the aforementioned bits and pieces – invitations, postage stamps, playing cards, greeting cards, board game pieces, and envelopes are fabulous materials for card making, scrapbooking and other paper projects.  This Etsy site has an amazing array of such supplies available for purchase (all vintage/second-hand).

English: Sheet of US Postage stamps, 1940 issu...

The key to not getting into mess and clutter by hanging on to all this stuff is to arrange items into categories (buttons, ribbons, stamps, corks, papers, fabrics, etc) and store them where they can be easily located.  And if you need inspiration or ideas on what to do with anything from an old belt buckle to a pair of holy denim jeans…I give you one word only…Pinterest!

Leave a comment

Filed under Green Craft

Upcycling: Cute Picture Frame Magnets

Miss L and I did some crafting together today.  When I explained what I had in mind she responded, ‘No!  I want to do drawing with my sparkly pens!’, in typical preschooler defiance.  She did do drawing, and it was beautiful.  But she was intrigued by what I was creating and quickly changed projects.

So we made some cute little photo/picture frame magnets for the fridge, using the top rims of tin cans and old/unwanted advertising magnets.  Together.  We had fun!  Here’s what we did.

IMG_2377

Find a tin can with a ring-pull lid.  Open it (using the ring-pull), remove lid and use whatever’s inside!  Wash and dry can.  Then use a can opener to go around the top of the already opened can to remove the rim.  One of the more modern types of can openers (like that pictured) will do the job.

IMG_2359

You will be left with a useful tin (minus the sharp bit on the inside) to house all sorts of goodies… as well as an interesting tin ring.  (It was the need to get rid of the sharp edge that’s left at the top of a ring-pull can after opening, that led me to discover this upcycling-worthy item.)

IMG_2370

Can you see that this otherwise piece of rubbish (well, actually, recycling!) is a perfect little frame?  (Click on the photo above to see the pattern of close lines on the rim).  So, find a sweet picture, a photo of a loved one or your child’s artwork.  Use the tin frame like a viewfinder to choose the best part of the picture then trace around the outside of the frame there.  Cut out your circle neatly.

IMG_2365

Then glue the frame onto the picture using PVC glue (I just happened to have it) or something else that will glue metal to paper.  It’s easiest to apply the glue to the frame rather than the picture.  And remember: with glue, less is more!  Alternatively, cut your picture to fit inside the frame, glue the wrong-side edge to the front of the inside rim, then glue a piece of card (re-use an old card, cereal box, etc) on to back of the picture and frame.  This produces a sturdier result, but I prefer the neater look with the picture behind the frame (you don’t need to cut quite as neatly, either)!

IMG_2363

You might want to leave the glue to dry a bit before the next step, which is glueing on the magnet.  Find a heavyish object to place on top – I used another tin can (with contents).  For the magnet I cut a square piece  from an old advertising magnet (I could have done a circle but I find it easier to cut square shapes).  I have a stash of these just through keeping old ones that I’ve acquired over the years.  I’m not a fan of advertising magnets – they’re not necessary, not recyclable (though at least re-usable) and create extra landfill.  But being on the receiving end of them has been unavoidable at times.  Anyway, these magnets make a nice flat backing surface for the picture, and you don’t have to go out and buy more stuff.

IMG_2364

Apply a thin layer of glue to the magnet (printed side), then place onto the back of the picture.

IMG_2366

Leave to dry, picture side up, with a heavy object on top.

IMG_2369

Your lovely framed picture magnet is complete.  They look much nicer on the fridge than business names and phone numbers (and real estate calendars)!  You could also make little doll house picture frames using the same method, minus the magnet.  Or cut out pic’s and sit them inside jar lids and glue a magnet on the back…but I like the look of the pattern on the tin rim.

IMG_2375

4 Comments

Filed under Green Craft