Category Archives: Living Green

Friendly Gardening Assistants

It’s time I wrote about our newest house-mates.  We met them in town a few weeks ago –  two blokes and four ladies. They needed food and shelter.  We’d actually been looking for some helpers in the garden, and this bunch was very friendly, so we agreed that they could stay with us.  We squeezed them all in to our van and brought them back to our place. They quickly settled in to their living quarters and helped themselves to food and drink.  Fortunately, we’ve found them helpful and charming so have asked them to board here long-term.  Providing they can do a few things for us in return.

Here’s their job list:

– weed removal

– distributing manure

– scattering mulch

– overseeing pest control

– turning over the compost

– entertaining the kids and teaching them responsibility

– eating some of our leftover food so it doesn’t go to waste

and one special task just for the men…

– waking us up in the morning (in case the kids forget).

I’ll admit, our house-mates are not living in our actual house.  They have a little one of their own.  In the orchard.  It’s an open-plan house with a miniature drawbridge style door and an upper level where they rest at night.  We close their door once they’ve settled down for the evening.  And open it for them first thing in the morning.

Our new friends are doing some wonderful work here.  So far they’ve fulfilled all their tasks on a daily basis.  Though on several occasions, I’ve had to politely move them on from certain areas of the garden where they’ve been a little overzealous with the weeding and scattering of mulch.

The girls also promised they’d produce tasty, nutritious morsels for us on a regular basis.  They said they’d start as soon as possible.  But so far only the oldest one has come through with the goods.  And only on three occasions.  I suspect the others need to grow-up a bit first.

Thankfully the men have been spot-on with their timing by not waking us before sunrise.  Actually it’s only the one fellow who’s been producing the morning wake-up call.  The other is still quite youthful and perhaps needs a sleep-in.  We were quite reluctant to have two males living under the one small roof at first – we didn’t want any fights breaking out, you see.  But we have ended up with two and they’re getting along quite well for now.  If there’s any trouble though, we’ll be finding alternative accommodation for one of them.

The kids have really enjoyed watching our helpers at work and following them around the place.  Miss Five often opens up their quarters in the morning and delivers some of our leftover food from the night before.  They appear to really appreciate this extra meal at the start of the day.  If the manner in which they scoff the food down and push each other out of the way to access it, is anything to go by.

We’ve become particularly fond of one of the girls.  She’s clearly had a very loving, attentive upbringing and is gentle and affectionate, yet sociable, and loves to come up to the house for a chat.  She’s formed a special bond with Miss Five, too.  Her name is Lulu.  She’s pretty, don’t you think?

IMG_7579


IMG_7424


2 Comments

Filed under Growing the Garden, Living Green

My Rusty Garden

I’ve said it before, that one of the appealing things about having old stuff around the place is the associated nostalgia.  It gives me a warm, happy feeling.  Which is a very good thing.  An anodised aluminium teapot that I keep on the slow-combustion heater for hot drinks in winter, sparks memories of Sunday morning tea after church in the hall.  And of the old (perhaps they were not very old, but I was just a kid back then) ladies who poured cups and cups of tea into proper tea cups, for me to drink with my biscuits.  When I fill one of my brightly-coloured anodised aluminium cups for a guest, I recall drinking cordial in Grandma’s kitchen.  And I’m taken straight back to my great grandmother’s sunroom when I sit in an old white wire patio chair on the verandah.  So around my garden, to add to the cheer that being amongst plants and nature brings, I’ve incorporated old furniture items that made me smile when I discovered them.

IMG_7200

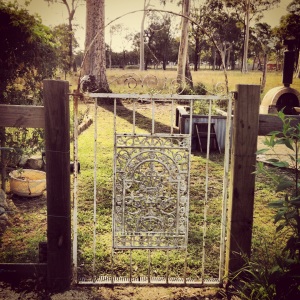
Since there are various animals living outside at my place, as well as young children about, decent fences are rather important.  And fences need gates.  Just an excuse to obtain more lovely vintage items really!  When it came time to fence our property, my husband and I drove across the countryside to collect old gates that we’d purchased on ebay and at our local second-hand auction centre (OK we didn’t have to drive that far…I don’t want to sound like we were racking up the fuel miles).  They added instant character and charm to the garden.  And now when I wander around outside or open a gate I remember walking along the footpath to school, looking in to front yards and admiring the lovely country gardens.

IMG_6976

IMG_6994

IMG_6988

IMG_6987

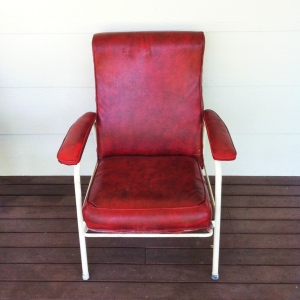
We also have lots of chairs outside and around the garden.  I have a thing for chairs.  Not that I get the chance to sit on one very often.  But when I count how many old chairs there are at my place I realise I’m a bit of a chair collector.  They are very useful at least.  And all are carefully placed.  So if you ever happen to visit, you can be sure you’ll find somewhere to sit, inside or out.  You’ll notice with these old cast iron chairs that they have lost a bit of paint.  That is the state that I bought them in.  And that is how I like them.  Otherwise they might look too new.

IMG_5494

Despite appearances, this one is still going strong and is actually very comfortable.

IMG_4915

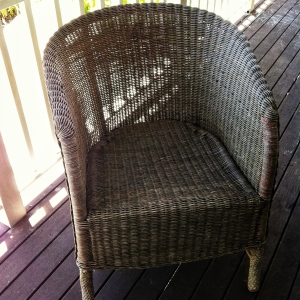
And on the verandah (the lovely antique wicker chair was a thoughtful birthday gift from my mum)…

IMG_7198

IMG_7199

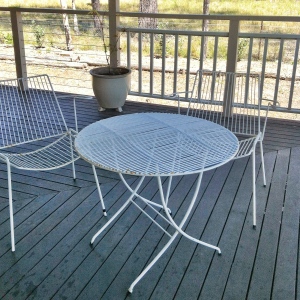
Tables are useful, too.  This is my favourite.  I wouldn’t dare paint it.

IMG_7197

IMG_4914

My vintage pot plant stands remind me of my grandma’s back door steps.  Hers was likewise laden with succulents.  And the miniature jade (Portulacaria afra) on the centre shelf originated in her mum’s wonderful garden.

IMG_7201

Note the rust.  Rust is good.

IMG_7202

I just liked the look of this one – a vintage bird cage holder.  I prefer to keep plants in the bird cage (which is actually not that vintage but I did buy it second-hand and it looks the part I think).

IMG_7187

It is just as well I have a large garden to house all this old furniture.  As my garden grows and changes, my collection of old stuff evolves with it.  And more memories are created.

4 Comments

Filed under Growing the Garden, Living Green

A Few of My Favourite Plants

My gosh I didn’t expect to have another prolonged break from my blog. But now that the craziness (but nevertheless awesomeness) of Christmas is out of the way, the Event of the Year (my big sister’s wedding) has occurred and was absolutely breathtaking and beautiful, and some other stuff has been ticked off my long list, I can get on with things in the blog department.

Aside from these other activities, I’ve been spending quite a bit of time in my old garden again. It’s one of my favourite places to be. And it’s also my thinking spot. Though the thinking doesn’t happen very coherently with a toddler and preschooler constantly butting in. Nevertheless when I was out in the garden the other day I thought: ‘I really, really need to write a blog post.’ And at the same time I was feeling some plant love. Which gave me an idea for this post: a spiel about my favourite plants in my garden. I don’t mean my favourite plants in general. I’m talking about plants that are useful and easy to grow or to propagate, in a permaculture-type garden (and in my temperate, almost subtropical climate in Australia). Some are edible and some are not. And others might be classified as ‘edible’, but I wouldn’t eat them unless I was starving on a desert island and they happened to be growing there.

Firstly I’d like to point out that I only have formal qualifications in animals, not plants. So don’t take my word for it. But I have been a gardener for a long time and I have spent many hours reading gardening books and magazines and watching gardening shows on telly (I think Kosta and Peter are pretty special – my apologies if you live outside Australia and haven’t the vaguest clue who Kosta and Peter are but trust me, they’re gardening heroes in my neck of the woods).

Here’s my list:

Queensland Arrowroot (Canna edulis)

Arrowroot is an attractive plant with large, green leaves and occasional (but beautiful) scarlet flowers.  The leaves are used for animal fodder and mulch.  The plant produces a large tuber, which can be cooked and eaten in similar ways to potatoes (roasted is my favourite) and also made in to flour.  (Although I’ve heard the rewards are disproportionate to the effort with regard to the latter.) It is the tuber which is planted and divided for propagating (too easy).  Like all good Queenslanders, arrowroot is remarkably tough and likes a warm climate. I recently had a bucket full of tubers sitting out in the hot weather for a couple of months yet they were still producing new shoots.  I planted them two weeks ago in the most horrible, compacted, dry (due to lack of watering) clay soil and the plants have already shot up to 20-30cm above the ground. So although they apparently like fertile soil and ample water (even waterlogged areas) they survive with sheer neglect.  Despite this I haven’t found them to be weedy perhaps because their spread is slow and the plants can easily be removed by way of the large tubers. Actually, when planted en masse and in a row, arrowroot can act as a weed barrier and will also protect other plants from wind and sun.

Comfrey (Symphytum Officinale)

Comfrey is one of those plants that gets me excited.  If you were to judge it on outward appearances you might think it was a nasty, prickly weed.  But it is wonderful and produces the most nutritious organic matter for the garden, by way of mulch, compost or liquid fertiliser (just add water and a few weeks).  Comfrey can be eaten in moderation, and is particularly beneficial for chooks.  I’m yet to sample the infamous comfrey fritter, though. There seem to be two schools of thought on its gastronomic merits: one that says it tastes just lovely, with a slight fishy flavour (which does nothing whatsoever to tempt me) and another that says don’t even bother! Comfrey is another robust plant and after being cut back, the leaves will regrow in a matter of weeks depending on the time of year (about 4 weeks to reach maximum size in the current warmth of summer at my place).  If planted close together it can be used as a weed barrier, for example, along the edge of a garden bed. Once it is planted in a particular location comfrey can be tricky to remove, as the plant will regrow from any little pieces of root that remain in the soil.  So plant it in a spot where it’s welcome to stay for a long while.

IMG_6721

Lemongrass (Cymbopogon species)

Another excellent mulching plant which is also hardy.  It grows to around 1m high and forms a large clump.  The plant is easily propagated by dividing up the clump or digging out smaller sections of roots from the main plant then replanting those.  Because of the strong clump that is formed, lemongrass can be a useful edging or barrier plant, to stop weeds getting past or to act as an informal border to a garden bed. It is happy with average soil and little water.  And I don’t think I need to inform you of its fabulous culinary reputation!

IMG_6911

Tamarillo (Cyphomandra betacea)

Tamarillo is a small, fast-growing tree that produces a bounty of delicious fruit of the same name.  I usually describe these as being a cross between a tomato and passionfruit.  Tamarillo trees begin fruiting within two or three years of planting, but only live for around five to seven years. So it’s generally recommended to plant more trees every three years.  They can be grown from seed (very easy to collect) or cuttings.  They are a must-have fruit tree for a warm climate.

Blueberries (Vaccinium species)

We planted nine blueberry bushes along the front of our house when we first moved here and now I consider that a wise investment. They started fruiting for us in their second year, and since then we have picked bucketfuls of berries each spring.  The bushes grow quickly and are relatively resistant to pests and diseases but they do need reasonable watering and regular additions of organic matter to produce yummy berries. Mine conveniently live adjacent to the comfrey row, so every now and then I simply pull off gloved handfuls of comfrey leaves and pile them around the base of each bush.  And since they like acidic soil, they get treated to our coffee grounds, too.  A plant that likes coffee has got to be super cool, don’t you think!? But one of my favourite things about growing my own blueberries (or any berries for that matter) is that it saves me from buying them in little plastic containers.  And I can eat handfuls of them at a time without feeling guilty about over-spending! Of course birds like to eat beakfuls of them at a time.  So you might want to cover them with a wildlife-friendly netting, such as Vege Net, which I purchased from Green Harvest. It ensured we actually had some blueberries left for ourselves this year.

Nettie's iphone 016

IMG_6073

Salvias (Salvia species)

Of all the flowering perennials I have a soft-spot for the salvias.  I grow several varieties around my garden and they never fail to give me a warm, fuzzy, plant-loving feeling.  Salvias are drought tolerant and grow quite fast and easily from cuttings. I have been known to just stick a salvia cutting into the ground rather than bothering with a pot; that’s how readily they produce roots. So if you haven’t propagated plants via cuttings before, salvias are an excellent starting point.  Salvias are useful for attracting beneficial insects such as bees and for just looking pretty. Many are also culinary herbs – common sage (Salvia officinalis) is probably the most widely known.  My favourite though is pineapple sage (Salvia elegans) because it does actually smell and taste of pineapples (perfect for adding to cool summer drinks) and produces a gorgeous scarlet flower for much of the year.

Nettie's iphone 423

IMG_6920

IMG_4901

IMG_4899

Here is a list of some other plants that I reckon are fabulous to grow in an organic or permaculture-style garden:

  • Gourd (Lagenaria siceraria) – grows from seed, on a vigorous, annual vine; the fruit can be eaten when small but I like to let them grow into giants that become unique ornaments and vessels when dried.
  • Luffa (Luffa aegyptiaca) – grows easily from seed on an annual vine.  And yes you can make your own luffa scrubbers with the fruit!  One plant will provide you with enough luffas for a few years, depending on how much you utilise them.  Not only are they fabulous exfoliators, they also make useful compostable cleaning scrubbers eg,for washing the dishes.
  • Nasturtium (Tropaeolum majus) – self seeds readily but not too far from the parent plant because the seeds are quite large. A pretty ground cover with a long flowering period.  The flowers are a lovely addition to salads and the green seeds can be pickled and eaten as a caper substitute.

IMG_6915

  • Aloe (Aloe vera)- I keep this handy in a pot on the verandah, ready to break open a leaf and apply the magic soothing gel as required to insect bites and minor burns.  It actually appreciates being sheltered from the sun in summer so being near the front door suits us both. Being a succulent it tolerates minimal watering.

IMG_6924

  • Globe artichoke (Cynara scolymus)- a survivor and easily propagated by dividing plants.  And of course absolutely delicious!

IMG_6919

  • Rosella – heat-tolerant and easily grown from seed.  Makes the best jam you will ever try!

Nettie's iphone 157

  • Scented geranium (Pelargonium species) – scented geraniums are easily propagated from cuttings, hardy and drought-tolerant with pleasant fragrances that vary amongst the species.

IMG_3908

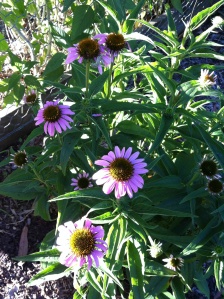
  • Coneflower (Echinacea species) – coneflowers are survivors and their flowers are just divine. Excellent bee-magnets!

IMG_6936

If you live in Australia, I realise now is not the ideal planting time by any means.  Many parts of the country have been getting sizzled by the heat for the past week and I’m sure there’s more of that to come.  And I’d imagine if you reside in the northern hemisphere now might not be a wonderful time to plonk innocent seeds or vulnerable cuttings into the soil either.  Nevertheless I hope I’ve given you some ideas for planting in the upcoming milder seasons.  Bring on Autumn and Spring!

4 Comments

Filed under Growing the Garden, Living Green

Bird Friends in the Garden

My poor little blog has been somewhat neglected of late.  Sorry about that.   My body and mind have been exhausted by Master J developing into a spirited and energetic toddler.  Nature’s plan for female humans to begin reproducing in their teens is  completely logical in hindsight.  I certainly could use some of my teenage (or even twentage) energy and physical condition in keeping pace with my one-year-old.  And four-year-old for that matter.  But then I suppose at thirty-something I have gained extra wisdom to help me get by.  Maybe.  I sure could do with more strength and vitality though.  Anyway.

Much of my time and creative thoughts have been taken up by a challenging bathroom renovation that is happening at my old abode.  More on that later I hope.  (Sooner rather than later would be good.)  But it’s actually this recent project that has led me to the topic of this post.

I’ve been spending many weekends at our semi-rural bushland property due to the reno (if you read about my blog you’ll see we’ve been separated for a short while…soon to be permamently reunited though…yay)!  We’ve been blessed with some charming weather.  And invariably along with that descends the feathered friends brigade!

These shots were all taken last Sunday on my iPhone.  First I was greeted, upon opening the blinds at 7.30am, by a gang of six sulphur-crested cockies and corellas.  I’m not sure why they had come together.  But there they were having an early morning party in our back garden.

IMG_5215

Later and throughout the day we were entertained with the antics and laughter of our resident kookaburras.  At one time there were five sitting around the front garden.  This youngster was courageous enough to venture so close that I could almost touch him.  In Australia we often take these iconic birds for granted.  But when given the chance to observe them close-up I get tingles down my spine.  Have you ever noticed how they can sit perfectly still watching from a vantage point and then in a flash retrieve a wriggling earthworm from the soil?  Or heard them chatter to one another quietly and quite different to the typical laughter that they are reknowned for?  Ever looked a kooka in the eye, front-on?  What an adorable sight.

IMG_5217

And finally our other special visitors.  The butcherbirds.  One of my favourite bird species. Not so much because of appearances, although I do think they’re beautiful to look at.  Not for their dining habits, although they are very clever in that regard.  But if you ever hear a butcherbird sing you cannot help but be entranced.  The sound is clear, melodious and could easily have floated out of a human-made instrument.  It gets me every time.  Last weekend it was seeing them so close that gave me a thrill.  Several of them appeared on the verandah while we were eating lunch.  And yes, they were being hopeful.

IMG_5216

We also had visits from the wood ducks, red-rumped parrots and noisy miners.  But we have many more bird species utilising our property, which we were once planning to name ‘Bimbadeen’ – an aboriginal word for ‘place of many birds’.  Until we realised it’s not a particularly unique property name.  (Google it and see for yourself.)

Here are some older pics of bird visitors at our place.

A pair of eastern rosellas on the fence.

eatern rosellas

A young grey butcherbird.  So sweet.

Nettie's iphone 422

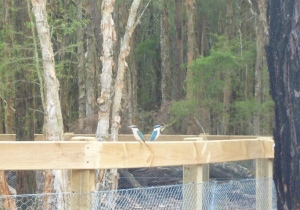
Sacred kingfisher couple.

P1010615

My pleasure in having wild bird company is enthusiastically shared by my kids.  Whenever he spots any variety of feathered friend, Master J is quick to produce his generic bird call imitation, together with a repeating sign-language gesture (tapping pointer finger on thumb to resemble a moving bird beak).  The infamous Indian Myna isn’t even spared such excitement.  And Miss L at four can already identify and name many more birds than the average Australian.  As well as being able to use her ears to determine what birds are about.

Pondering all this reminded me where my love of birds and the ability to identify them originated.  I spent many a camping trip or bushwalk as a youngster, creeping about the bush with my mum, oldest brother and sister, binoculars at the ready and bird book on hand.  The treasured binoculars, which I still own (despite the existence now of far superior models) were one of my earliest birthday gifts (I think I was six or seven) and they were proper adult ones.  Not a toy version like the pair Miss L has.  I was pretty thrilled to be trusted with using and maintaining such a special piece of equipment.  (And of course the binoculars were not only used for spotting birds.)

I realise that bird-watching is not a hobby that’s enjoyed by the masses.  You discover that fact quickly when you are frequently the only person around who doesn’t call every black and white bird a magpie or when others are surprised by your ability to make a distinction between a cockatoo and a corella.  Bird-watching is  perceived by some to be a pretty nerdy past-time too.  But Bill Oddie is an avid bird-watcher!  So it has got to be one of the coolest activities around.  Right?  He was always the hip one after all.

The whole process of seeking and identifying wild birds is just the perfect activity for kids.  For a start it gets kids outdoors.  It invites adventure but also teaches patience and listening.  It helps kids learn to appreciate fine details and subtleties of an image, to differentiate colours and patterns, and distinguish shapes.  Since bird-watching also incorporates bird sounds, it develops the sense of listening very well.  There might be three or four different bird calls going on at once, but a bird-watcher learns to discern that one call and put a name and face to it.  It’s a calming, quiet-time activity.  We need lots of those up our sleeve as parents.  And it involves challenge and achievement so it’s fantastic for kids’ self esteem.

If you’ve never done any bird watching before go on.  Try it. With your kids.  No matter how young they are.  Grab a bird book.  It doesn’t have to be the latest flash one…bird names haven’t changed that much over the years.  I bought mine from the local charity store as you might have guessed.  Get yourself a pair of binoculars if you’re keen.  Though to start with, especially with young children, you don’t need them.  Go outside!  Even the most urban areas in Australia have birdlife so it’s not a prerequisite to be in the bush.  But if you are that’s wonderful.

For some fabulous advice on bird watching as well as some excellent resources, check out the Birds in Backyards website.  (Note: this is an Australian website, so it mostly relates to Australian birds but it does have general bird-watching advice too.)  My best tips?

– Practise being still and quiet.  Not only so you don’t frighten the little birdies but also to help you hear their calls and movements.  Challenging for kids at first but you’d be amazed how easily this can be achieved once they realise the reward.  Whispering and using hand signals to communicate when you’re on the bird hunt also adds to the fun.

– Observe a bird for as long as you can so you get to appreciate its size, shape, beak appearance, colours, patterns, calls and behaviour.

– Familiarise yourself with groups of birds and their features (eg, parrots, owls, wrens, kingfishers, honeyeaters).  This will help when it comes to searching through pages for that one feathered friend amongst hundreds.

–  Get to know your bird book.  Most are divided into sections, with the first part usually providing very useful general information about bird identification and also a key to the different bird families.

– Take note of your location and utilise the distribution maps in the bird book.  If you see a kookaburra in southern Australia it’s not going to be a blue-winged kookaburra unless it’s in an aviary.

– Keep a record book of birds you’ve identified.  Kids will love this part.  Keeping tabs on things is a favourite past-time of most kids.  Younger kids can include drawings or photos.

The Birds in Backyards website keeps tabs too…on what birds are hanging around urban Australia.  By becoming a member (no fee required) you can participate in some important surveys.  Trust me it’s easy.  And very rewarding.

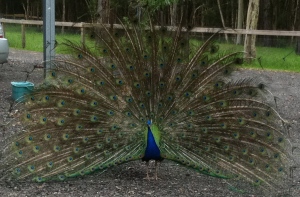
Finally, here is a bird who you won’t need a book to identify: our non-native neighbourhood peacock (Mr Peacock to friends) who makes periodic appearances in our garden and never fails to put on a show.  What a stunner.  If anyone can inspire you to take up bird-watching with your kids, Mr Peacock can.  Surely.

Nettie's iphone 504

Nettie's iphone 564

2 Comments

Filed under Kids Stuff, Living Green

Typewriter Love

20130702-233326.jpg

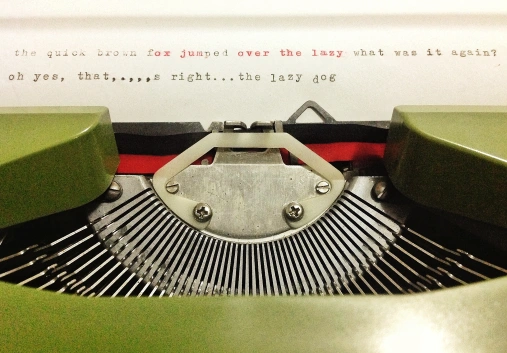
I received a new toy in the post today. Well. It’s clearly not new. But hey, I haven’t used a typewriter since tapping the keys of my mum’s 1960’s Olivetti Lettera 32, back in the eighties. So to me it’s as good as new.

And it seems to be working fine so far. But I must say that ‘tapping’ is hardly the correct description to use in reference to pressing down the keys of a vintage typewriter. If one merely taps on a key one can barely get the key to make contact with the ribbon. ‘Bashing’ is more apt. Perhaps before modern computers, smart phones and pads, tapping was an acceptable word. Before we really new what it was like to literally tap out a few words with our fingers.

Today after testing the keys to make sure they truly are in working order, I announced to my mum (via a tapped out text message on my smart phone): ‘How you ever typed fast on a typewriter is beyond me’. Mum could type fast. Lightning-fast it appeared to me when I was a two-finger-tapping…make that ‘bashing’…youngster.

Anyway, I didn’t make my new purchase to assist with my typing speed. I decided I’d like to use a typewriter to produce little labels for some of the softies and such that I create. I thought genuine typewritten cards would be a nice touch. As opposed to just using a computer typewriter font and printing them.

So I’ve been searching online lately and eventually found this Olympia Splendid, apparently from the 1970’s. I didn’t pay much for it. I bid on ebay and was the lucky winner. But golly gosh. I could have paid lots and lots for an old typewriter. During my recent typewriter quest I discovered that people will pay big money for old typewriters. Even if the machines are not in working order. Antique stores, online or not, seem to charge no less than $100 for anything from the 70’s or older. Mostly closer to $200, and of course the asking prices go well above that especially for any that hail from the first half of the 20th century. On ebay it’s easier to snap a bargain, but most of the starting bids for vintage typewriters are set at $60 or more! Plus delivery.  I settled for something that was still clutching on to it’s youth, and in working order. But without an exorbitant fee.

20130703-003054.jpg

There’s something really appealing to me about vintage typewriter typeset. The imperfection. The rawness. The nostalgia. And to enrich this appeal is the existence now of different coloured typewriter ribbons. My excitement on discovering not only green and blue but pink…yes!..and purple…no?!…was perhaps a slight overreaction! But isn’t that brilliant?!!

My intention was to type out this post on my splendid new typewriter.  And then scan it.  I thought it would look quite cool.  But the problem is a typewriter wasn’t intended to use when everyone else in the house (particularly easily woken babies) is asleep.  And when everyone else in the house is asleep happens to be the only chance I have to write my blog posts (without distraction).  I also wanted to finish the post before the end of the year.  So I had to settle for the above photo.

I might just become an obsessive vintage typewriter collector yet. Like this fellow in Canberra. Amazing.

But for now I’m going to get re-acquainted with an old friend. Not that old, really. But old enough to be vintage. Just like me. I think we’ll be happy with each other.

2 Comments

Filed under Living Green

A Few of My Favourite Green Things

I just wanted to share some of the eco friendly products that I use and find fabulous.  In this age of the eco-conscious consumer (I like to think of it that way…perhaps I’m a little optimistic) I’m often amazed by the availability of green product versions.  Since I live in Australia, the products I use tend to be Australian, or from as close to home as possible.  If you live overseas, you probably have some different but similar eco products at your fingertips.  I’ve discovered that it always pays to search online for eco friendly versions if I’m after a new item.

1. Soapnuts: I love these!  Nature’s soap that grows on a tree.  Soapnuts are berries that contain saponins.  They grow wild in the foothills of the Himalayas.  Locals collect the fallen berries, remove the seeds and dry the shells (which contain the saponin) in the sun, then ship them off to the sellers in Australia (and other countries).  It’s a completely sustainable and fair trade practice.  Soapnuts do an awesome job of cleaning your laundry, body, hair, dishes and home.  Then onto the garden or compost they go.  Wonderful.

Soapnuts

Soapnuts (picture credit: wildsoapnuts.com.au)

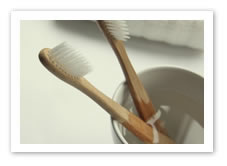
2. The Environmental Toothbrush: A completely biodegradable (it’s compostable) toothbrush made of sustainable Moso bamboo and designed by an Aussie dentist.  They come in adult (medium and soft bristles) and child sizes and compare favourably in price to regular toothbrushes, that are made from petrochemicals and end up in landfill.  If you prefer plastic, then check out these toothbrushes made by Preserve in the United States, from recycled plastic.  The company also offers a recycling programme and sells a range of recycled plastic kitchenware and tableware.  I love these, but tend to favour the bamboo toothbrushes as they’re made closer to home and have a beautiful, natural look and feel.

The Environmental Toothbrush

The Environmental Toothbrush (photo credit environmentaltoothbrush.com.au)

3. Tread lightly on the planet with a pair of My Honeybees sandals, and help save precious bees at the same time.  Made of 100% recycled rubber these sandals come in an array of gorgeous colours and their sale helps support the work of Aussie CSIRO scientist Dr Dennis Anderson and his Bees Downunder Foundation.

My Honeybees Sandals

My Honeybees Sandals (photo credit: myhoneybees.com.au)

4. If you’re a straw-y kind of person then try a reusable glass one from Glass Dharma.

Glass Dharma Glass Straws

Glass Dharma Glass Straws (photo credit: glassdharma.com)

5. Makedo: a clever connecting system for making stuff out of trash.  They are completely recyclable too.  I love Makedo so much I have a page dedicated to it on my blog!

Makedo

Makedo system (photo credit mymakedo.com)

6. Ecotools: a large range of cosmetic brushes and bath tools made with environmentally friendly materials including bamboo and recycled aluminium.

Ecotools make-up brushes

Ecotools make-up brushes (photo credit: ecotools.com)

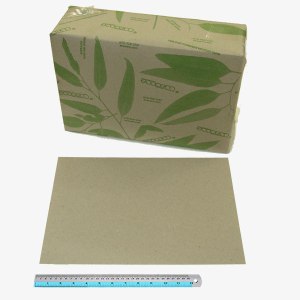
7. Ecocern: the most eco friendly recycled paper available in Australia.  It is non-bleached and made from 100% post-consumer scrap paper, in Australia.  The range includes cardboard and envelopes.

Ecocern recycled paper

Ecocern recycled paper (photo credit ecocern.com)

8. Full Circle: cleaning brushes and sponges made from eco friendly materials including recycled plastic, bamboo and cellulose.

Full Circle cleaning brush

Full Circle cleaning brush (photo credit: Full Circle)

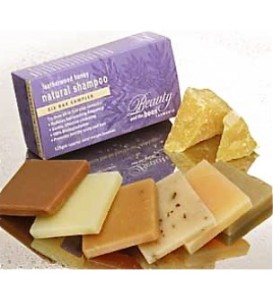
9. Shampoo bars and facial cleansing bars from Beauty and the Bees in Tasmania.  My favourite thing about these is that they don’t come packaged in plastic bottles but in recycled cardboard.  They are also palm oil free, which is rare in soap products  (in fact, any products), and they are natural, luxurious and gentle.

Beauty and the Bees shampoo bars

Beauty and the Bees shampoo bars (photo credit:beebeauty.com)

10. Let’s not forget the dunny (that’s toilet, if you’re not familiar with this Aussie colloquialism).  Frankly I don’t think our bottoms are that precious that they need to be wiped with virgin timber paper.  I always choose recycled paper toilet paper.  My preferred one is Safe, as it’s made from 100% recycled paper, is unbleached, housed in recycled paper packaging and made in Australia by an Aussie company.

Safe Toilet Tissue

Safe Toilet Tissue (photo credit: planetark.org)

I’m quite happy to promote products with such impeccable eco-credentials.  My list could go on quite a bit further.  The point is we can choose to make responsible purchases, because there are eco friendly options for just about everything you might want.  What are some of your favourite green products?

2 Comments

Filed under Living Green

Weekly Upcycling Inspiration: The Cardboard Box

Welcome to your weekly serving of upcycling inspiration! Once a week I’m going to feature an item for which I’ll endeavour to list some upcycling ideas. They might be my own or they might just be little light bulbs of genius that I pinch from someone else.

Cardboard boxes are incredibly useful for their intended purpose of storage and transport of goods. And they can be reused in this way over and over again. Plus they are completely recyclable and biodegradable (minus any sticky tape). We love cardboard boxes in our household as they are a wonderful resource for kids play. There is always a supply on hand ready for a rainy day!

1. If you haven’t visited my Makedo Creations page yet, then go on, take a peak. I hope you’ll be inspired by what my husband and daughter have made with boxes and other recyclables and trash. Here is their latest creation…a checkout.

20130527-025039.jpg

20130527-030027.jpg

20130527-030305.jpg

20130527-030337.jpg

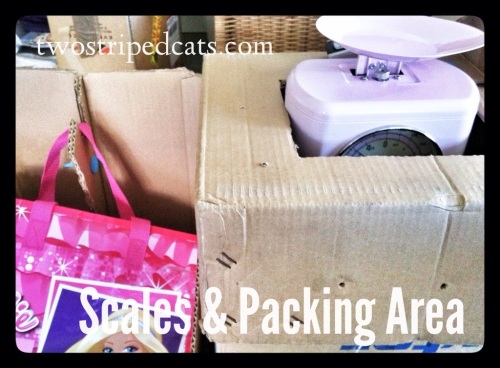
Complete with conveyor belt, scanner, monitor, scales, eftpos machine and packing area it’s been a popular play area for the children for the past couple of weeks. It uses only boxes and Makedo connectors plus an old mobile phone (eftpos machine) and real scales.

2. Use to suppress or kill weeds and grasses under a thick layer of mulch. Overlap pieces of opened out cardboard box on the area to be mulched, wet down then apply mulch. This is also a great way to smother grasses when building a no-dig garden bed or other raised garden beds onto a patch of lawn.

3. When wrapping odd-shaped gifts place the items in a box then wrap (reuse wrapping paper and other papers, fabric, etc). It will be much easier and neater.

4. Make an office in-box by cutting off one large side and the top. Cut the end of the narrow sides on an angle. Cover in decorative or interesting paper or fabric.

5. Make a magazine holder with a sturdy cereal box.

6. Place strategically under furniture when rearranging it, to protect the floor and make it easier to slide.

7. Entertain your pooch. Fill smaller boxes such as cereal boxes with dry dog food or treats, close then give to your dog to rip apart. This is a fabulous way to feed an active or young dog who needs lots of stimulation. Rather than gobbling up the food in a flash, your dog will spend extra time extracting the food and tearing up the box. The pieces of torn cardboard can later be placed on the compost.

8. Make a sled for snow or a grassy slope.

9. Protect fingers when hammering a nail. Push the nail through one end of a rectangular-ish piece of cardboard and hold onto the other end once you commence hammering. Remove cardboard then complete the hammering if necessary.

10. When transporting furniture and household items in a vehicle or trailer, use pieces of cardboard box placed flat against the items to protect against damage from rubbing and to help hold them in place. Use small pieces under ropes, again to stop rubbing but also to help secure the items when the rope is tightened.

Of course if you are a cat (or live with one) then you know what the best use for a cardboard box is, don’t you? No need to waste precious energy on upcycling. 🙂

2 Comments

Filed under Green Craft, Kids Stuff, Living Green

Homemade Spread for Your Bread

Do you fancy a little spread on your bread?  I do.  But I didn’t always.  For a long time I took the healthy option and went without.  Even on toast.  Even with vegemite.  Then my first child started eating toast…and sandwiches…and it all went out the window.  I began applying a yellow slather of butter or marge to any serving of bread or biscuit, even if it was to be spread with another kind of spread that really could hold its own because it’s so full of oil anyway.  (I’m talking peanut butter and friends).  Now I can’t go without it myself.

Here’s the dilemma though.  I love the taste of butter (I actually mean real butter…you know, the kind that was once cream) but it is quite naughty.  Not fantastic for the arteries.  And it needs a little work before it can be applied to bread in a cooperative way.

Then there’s margarine.  Now margarine has had its share of bad press because of its high content of trans fats (these are unhealthy fats disguising themselves as the good guys) from hydrogenated vegetable oils.  According to the Heart Foundation, the levels of trans fats in margarines in Australia are actually low (a result of the Heart Foundation pressuring manufacturers years ago).  It’s a different story though in many other countries, especially the United States.  But, for Australians it seems the healthy option (other than opting out) is margarine.  Here’s an excellent summary of butter versus margarine by Australian nutritionist, Catherine Saxelby.

Back to the dilemma.  I could cope with choosing margarine over butter if it was only about the taste.  I could tolerate margarine.  But I can’t tolerate it.  Unfortunately, it seems most margarine-type products in Australia (including spreadable butters and olive oil spreads) contain palm oil.  (Check out this useful guide about which products are palm oil free…or not).

So for me, it’s either abstain – which I’m sure my body would thank me for – or choose healthier and orangutan-friendly options.  Here are some ideas on what to use instead of butter and marge:

1.  Avocado – superior nutritional value and comes pre-wrapped in it’s own biodegradable packaging.  And if you haven’t tried avocado and vegemite you’ve been missing out!

2.  Nut butters – peanut, cashew, almond and hazelnut.  I’m sure there are others, too.  Just make sure you buy 100% nut spread to be sure the sly Mr P.O. hasn’t made his way in to the jar you’re consuming (or go to the link above for the guide).

3.  Tahini – a.k.a. sesame seed spread.

4.  Hummus.

5.  Extra virgin olive oil.  I’ve read about people freezing olive oil too, to turn it into a bit of a spread.

6.  Make your own olive oil and butter spread.  This is sooo simple.  And if you make it you know exactly what went into it.  Yes it contains butter.  But the butter is diluted considerably with the olive oil (to around 50% if you follow the quantities below).

Home-Made Olive Oil and Butter Spread

Combine 250g softened butter with  1 cup olive oil, and a little salt if you like,  in a food processor.  Or mix it up with a wooden spoon, whisk or hand beaters.  Just mix it up enough so that the butter and oil are blended together to a lovely, smooth consistency that looks like runny margarine.  

IMG_3970

IMG_3978

That’s it.  Nothing more.  

IMG_3977

Pour the mixture into a clean container and pop it in the fridge.  

IMG_3972

It  will firm up after an hour or so.  

If you like a firmer consistency and don’t mind the higher butter:oil ratio (the more butter, the naughtier) you can reduce the amount of oil to about 1/2 cup.  Anything less and it will be starting to resemble butter and be equally hard to spread.

Use a lighter oil if you’re not keen on a strong olive oil taste but if you’re an olive oil fan then go for extra virgin as it’s healthier.  You could also experiment with different plant oils.  I haven’t.  But I reckon macadamia or grape seed oil would be worth a try.  And of course, use certified organic ingredients if you can.

I’m planning to return to my days of spreadless bread.  Some time soon.  Really.  I will.  But in the meantime I’ll stick to the healthier and pro-orangutan choices.  What do you think?  Would you give one of the spread alternatives a go?  Or do you already use them? Or go without?

1 Comment

Filed under Eating, Living Green

Weekly Upcycling Inspiration: The Tin Can

Welcome to your weekly serving of upcycling inspiration!  Once a week I’m going to feature an item for which I’ll endeavour to list some upcycling ideas.  They might be my own or they might just be little light bulbs of genius that I pinch from someone else.

Craft tool cannister

This week I’m featuring the tin can (also referred to as the steel can or just plain old can or tin).  Steel is 100% recyclable, and although considerably less energy is required to produce steel from recycled cans (75% less than making it from scratch, in fact)  it takes only a little bit of your energy to transform a can into another very useful thing.   (Check out some tips on recycling cans here.)

Pencil holders: cans covered with origami paper

1. Decorate (or not) with pretty or interesting papers (old maps, music sheets, wrapping paper, etc), paint, fabric or old buttons, and use as canisters to house all kinds of items – pencils and pens, paintbrushes, scissors, tape, rulers, knitting needles, crochet hooks.  Take a peek at these clever storage ideas here and here.

2. Turn into pots for plants.  Make drainage holes in the base first, using a drill with a drill bit designed for metal. Decorate or leave plain.  I tend to go for the natural look as the rust that develops adds charm.  Or you might like to leave the label on.  Any steel can is fair game – large or small, round or square.  The small tuna-type cans make cute little pots for succulents, which survive with minimal soil as their roots are so shallow.  Large cans, such as those for olive oil or Milo, make excellent pots for herbs.

Succulent in tuna can (this one was already coloured by the manufacturer)

Scented geranium in old Milo can

3. Use the top rim to make little picture frame magnets.

4. Make percussion instruments for youngsters.  For drums use larger cans with lids (and let your child bang away with whatever is on hand…hopefully something like a wooden spoon or chopstick).  Or cover a lid-less can with a section of old balloon or baking paper and secure with a rubber band.  If filled with dried pulses, rice, bottle caps – those sorts of things that will make noise when tossed inside a steel can – it can double as a shaker.  Go over to Mini Eco for a colourful version using ordinary tin cans.  Or be inspired by this too cool for school drum kit featured on Little Lovely.

5. Create a tin can lantern or try your hand at candle making (preferably using old candle scraps or beeswax) and use the can for a container candle or home-made citronella candle.  When it comes to melting the wax, you can even use a tin can to melt the wax in (as the part of the double boiler) so you don’t ruin a precious bowl.

6. Make a tin can telephone with the kids.

7. Need a height advantage?  Fashion a pair of can stilts.

8. Use as a round cookie cutter by removing the lid and base or make into custom shaped cookie cutters via Mother Earth News.

9. Stock-up the kids’ play kitchen.  Be sure to select cans that have a smooth edge where the lid was removed (or expect your bandaid stash to dwindle).  Wash carefully, leaving labels on.  You might be able to replace the lid (if removed with a can-opener rather than a ring-pull) and secure with glue, for authenticity’s sake (trust me…your child will think you are VERY clever)!

10. Make pigeon holes by glueing several cans together and placing them on their sides.  

What can you do with an old can?

Leave a comment

Filed under Green Craft, Living Green

Making Beauty

Have you ever made your own natural beauty and skin care products? My sister and I discovered this art when we were teenagers. Yoghurt face masks, egg white face masks, oatmeal face masks (we liked face masks), cucumber eye patches, egg yolk hair treatments and lemon juice hair lightener ensued. Mum must have wondered where all the food supplies were going! Or perhaps it was no mystery. I can remember at least one occasion when my mother was startled by the sight of a white-faced (yoghurt) body, with cucumber slices for eyes (under-eye circles), lying prostrate on the floor (relaxation).
Creating home-made skin care treatments is loads of fun – even my one year old son would agree smearing yoghurt all over one’s face is a wonderful pleasure! The best part about handmade natural products, though, is knowing what’s in them…no 3 digit numbers or acronyms here…no palm oil either. Your body, our waterways, and orangutans, can breathe a sigh of relief. The second best part for me is: minimal packaging. The beauty products industry is renowned for excessive packaging and most items come in plastic. Only a few of the ingredients in home-made preparations need come plastic-clad…most can be sought in glass bottles, cardboard boxes, recycled packaging or even nude (straight from the garden or hen-house).

Ingredients (clockwise from top left): beeswax; honey; bicarb soda; macadamia oil

Now that I’m a grown-up I like to dabble in making my own beauty products on a little more refined scale. Though I still do reach for an egg white or yoghurt when I need a face mask (this happens about once a year these days). I tend to make preparations that are slightly more complicated…but still not very tricky. Below are some of my favourites – all fairly quick, easy and inexpensive to produce and don’t require many ingredients that you wouldn’t already have in the cupboard or fridge. They can be made up in batches and stored to use as required.

But first…a note on beeswax

Beeswax is widely available online. Most recipes don’t require very much – a small supply will last quite a long time. Try to find cosmetic grade beeswax from an organic supplier that is as local as possible. Also, most recipes describe melting beeswax in a double boiler as for melting chocolate however, I have found I can melt it very carefully in the microwave in a pyrex jug. As with melting chocolate in the microwave, to avoid burning it, use a medium power and do short bursts of heat at a time (say 1-2 minutes) checking and swishing it around to facilitate melting, as you go.

And…a note on oil

I tend to use macadamia oil when a recipe calls for oil (as with the other plant-based oils you can also rub it onto your skin straight). I started using macadamia oil because I could obtain it from a local, biodynamic producer. Once I’d tried it on my skin, and did some research, I was a convert. It does have quite a strong nutty smell which I find appealling but apparently some people don’t. If you have a local source of another organically produced plant-based oil such as olive (virgin or extra virgin), almond or coconut (virgin) then use those. As explained over here, you might find one of these suits your skin better than the others. And if you have a tree nut allergy, avoid using tree nut oils on your skin!

RECIPES

Lip Balm

90g beeswax (grated)

125mL (1/2 cup) macadamia oil

Melt the beeswax and oil together in a double boiler or in the microwave as described above. Avoid boiling the oil (be sure to check it regularly if using the microwave method). If this occurs, allow the mixture to cool before adding any other ingredients and pouring into containers. Once the beeswax is melted, remove from heat, stir to combine then pour into clean containers (used lip balm containers and small glass jars work well). Allow to rest at room temperature for 48hours before using (to allow proper setting).

Variations: I quite like the plain lip balm, but you could try the following variations, especially if making the lip balm for gifts. (The extra ingredients should be added after allowing the combined macadamia oil and beeswax to cool slightly.)

1 – 2 teaspoons of honey

1/2-1 teaspoon of cocoa powder

6 drops (approx.) peppermint essential oil – this gives your lips a bit of a zing! (Or try another essential oil)

Note that most of the lip balm recipes I’ve found include vitamin E as a preservative. Since macadamia oil has high levels of vitamin E, I don’t bother with this ingredient, however if using another plant oil, such as olive oil, add 500IU (1/2 capsule) vitamin E at the same point as for the other extra ingredients.

Or try one of these lovely recipes by Crunchy Betty.

Hand/body balm with macadamia oil

Hand/Body Balm

1 cup (250mL) macadamia/olive oil

 50g beeswax

Warm the beeswax and oil together gently in the microwave or in a double boiler. Stir to combine and place in clean containers (eg, glass jars). Allow to set at room temperature. To make a slightly more creamy balm, add 1&1/2 tablespoons (30mL) coconut oil and an extra 10g beeswax to the mix. You can also add your favourite essential oil such as lavender, vanilla or rose.

Oatmeal and Bicarb Face Scrub

This works really well and can be used for any skin type but is particularly helpful for problematic skin. Combine two parts fine oatmeal (if too course you might need to whizz it in a spice grinder) with one part bicarbonate of soda. Place in a sealed container. To use, make a paste with water then apply to face. Leave on for one minute, rub gently on skin in circles then rinse with warm water. I tend to use this in the shower as it’s a bit messy! You can use both of these ingredients on their own too, but for best results use them together.

Sugar/Salt Body Scrub

Add 1 cup of oil (macadamia, olive, or almond) with 2 cups of sea salt or certified organic raw sugar and combine. Store in a wide-mouthed container (I use a steel container that previously held body balm).

Bath bombs

Bath Bombs

These are fun and simple to make – a perfect activity to do with kids. They will enjoy using them too. Take a look at this lovely recipe by Idle Wife or use the slightly simplified version below:

1 cup bicarb soda

2/3 cup citric acid (smaller packets available in supermarkets; bulk amounts online or in health food stores)

1 tablespoon macadamia oil (or other plant oil)

6 drops (approx.) essential oil of your choice (I like peppermint or lavender)

food colouring

Combine the dry ingredients, squashing any lumps with the back of a spoon. Add the oils and colour and mix well. When squeezed the mixture should just hold together. If not add a little more oil. Press firmly into lightly oiled moulds (I use a silicone cup-cake tray but disposable plastic muffin containers would work well too). Allow to dry (and harden) for a few hours before removing from tray and storing in a sealed container.

There are countless resources (including online stores) on this topic with thousands more recipes. I’m not going to attempt to make a list of them here. Once you’ve tried a few simple recipes you might get hooked and decide to add some more impressive concoctions to your repertoire. I hope you can see that making natural beauty products at home is not only do-able, it’s actually easy! A whole lot simpler than deciphering the ingredients list on a typical store-bought bottle of face cream. That’s for sure!

3 Comments

Filed under Green Craft, Living Green